This site is no longer maintained!

This site is no longer maintained!
Showing posts with label HowTo. Show all posts

8.16.2015

Windows 10 new Cmd Prompt & 35 Shortcut keys

Posted By: RB - August 16, 2015


One of the most unchanged component of windows has been window's Command Prompt. Unlike Linux where every desktop environment (XFCE, KDE, GNOME ) to name a few, has it's own flavor of terminal (Console cmd for Linux) full of customization. Following this Microsoft tries to adopt the same thing and with the release of its newly launched Windows 10 you can experience the same.

Yes that's true, now you can customize Windows Command Prompt from making the screen transparent to enabling control keys shortcuts or using quick edit mode. So in this post we talk of Windows 10 featuring new command prompt and its various shortcuts keys.


What's New in Cmd Prompt:

  • Edit Options - Lets you choose from various editing method like quick edit mode, enabling Ctrl shortcuts(Ctrl +V, Ctrl + C).
  • Text Selections - This Option allows to select different Text Selection Wrapping and extending text selection.
  • Legacy Console - If you don't like customization and rather want to go back you can do this by enabling it. By default this option is enabled in Windows 10 and if you want to take the tour of new cmd prompt you must first disable this option. By disabling it you will be able to open the door of new cmd prompt options.
  • Opacity - This is an option where you can make cmd prompt screen go transparent from minimum level of30% to maximum level up to 100%. To enable the Opacity (found in Colors menu) you need to disable (uncheck) the Use legacy console option.

To get started right click anywhere in the console title bar and choose properties. Click on the images for clear view.


To make best possible use of new features of Command Prompt we recommend you to enable all the options by disabling (uncheck) the Use legacy console (require relauch) option.

Whats more you can even change screen layout (size), change screen background, change text color and more right from cmd properties.


Windows 10 Cmd Prompt Shortcut Keys

  • Editing Keys:
         These keys allows to copy paste a text from a clipboard to windows command prompt. You must check the box next to the "Enable Ctrl Key Shortcuts" in Edit Option to enable Ctrl +V or Ctrl + C shortcuts.

             CTRL + V                Paste text into the command line.

             CTRL + C                Copy selected text to the clipboard.

             CTRL + INS             Copy selected text to the clipboard.

             SHIFT + INS           Paste text into the command line.

             CTRL + X                This is not yet implemented.

  • Mark Mode Keys:
         These keys function in mark mode. You can enter this mode by right clicking anywhere in the console title bar and choosing Edit -> Mark from the context menu or via the shortcut provided below.

             Ctrl + M                      Enter Mark Mode to move the cursor within window.

             Ctrl + Home                Move cursor to the beginning.

             Ctrl + End                   Move cursor to the end.

             Arrows Keys                Move the cursor in the direction specified.

            Page Keys                    Move cursor by one page in the direction specified.

  • Text Selection Keys:
            Shift  + left Arrow                    Move the cursor to the left one character

               Shift  + right Arrow                  Move the cursor to the right one character

               Shift  + UP Arrow                    Select text up line by line starting from the location of the insertion point.

              Shift  + Down Arrow                Extends text selection down one line, starting at the location of insertion point.

              Shift  + Home                            Extends text selection from cursor point to Home point (starting point)

              Shift + End                                Extends selection from cursor point to end point.

           
  • Navigation Keys:
          Home                           Jump to the beginning of the line.

          End                              Jump to the end of the line.

          Ctrl + Arrow left            Jumps to the next word.

          Ctrl + Arrow right          Jumps to previous word.

         
  • Manipulate Keys:
          Ctrl + Backspace           Deletes word left to the cursor.

          Delete                          Deletes characters right to the cursor.

          Tab                              Auto-complete folder name.

          Escape                         Clear current line.

          Ctrl + Home                 Delete from cursor position to beginning of the line.

          Ctrl + End                    Delete from cursor position to end of the line.

          Ctrl + Z                       End of line, text after this would be ignored.


  • Recall Keys:
          Arrow UP                     Input previously read command.

          Arrow Down                Input previously read command.

         Arrow Right/F1             Type previous command character-by-character.

         F3                               Repeat previous command.

         F7                               Show previous history commands.

         Alt + F7                       Clears previous history commands.


  • Other Keys:
         Ctrl + F                       Open Find Dialog.

         Alt + F4                      Close the console windows.


Please leave your comments if you're having problem, understanding any of the above commands.

Hope this helps!

P.S: If you know any more commands that we missed please share it with us and we shall update it in our records.

8.09.2015

Enable Cortana for Windows 10 in non available region

Posted By: rbashish - August 09, 2015


It's been over a week since Microsoft's Windows 10 launched in 190 countries on July 29, 2015. We feel great running Windows 10 as there are many changes in the system. 

Windows   10   is   built   with   many   features   from   Enterprise   to   personal   use,   One   such new feature is "Cortana for Windows 10" but we were very disappointed to see the unavailability of Cortana in our region.


According to Microsoft: Cortana  is available in the following countries/regions: China, France, Germany, Italy, Spain, United Kingdom and United States


As there is a saying : 
Necessity is the Mother of Invention 
So we discovered it. The reason is very simple we really wanted to run our hands on Cortana. And we could not wait for it to become available and give a try. In this post we show you "How to Enable Cortana for Windows 10 in non-available region" Here's your guide to it.


         1.  Verify whether it is available in your reason or not?
                 Click the search the Web and Windows bar/icon > goto Cortana settings option no. 2


         2.  Now that you know Cortana isn't supported in the region you have selected, goto control panel and click on the region tab as shown in the video.

         3. Change the Home location to the location where cortana is available right now. You can select from one of these countries/regions. But we would recommend you to select the region as United States:
  • China
  • France
  • Germany
  • Italy
  • Spain
  • United Kingdom
  • United States (Recommended) 


That's it, You are good to go now. Enjoy Cortana.

We would love to hear you. Do let us know if you are having trouble Enabling Cortana by commenting below and we would be happy to help.


6.06.2015

Complete step by step Guide and How to upgrade to Windows 10 for free

Posted By: rbashish - June 06, 2015


Hello folks, in our previous post we looked at the the Windows 10 release dates, features and how to reserve your Windows 10 free upgrade (with short description). Click here to read previous post. But in this post we will be looking at complete step by step guide to reserve windows 10 free upgrade. Before you begin you might want to make a note:


NOTE:
In order to reserve your free upgrade to Windows 10 you need to be a qualified windows user to be able to participate in reserving the same. If not we are sorry you won't be able to reserve and upgrade to windows 10. This is what Microsoft has planned right now. We believe you got our note! Right? OK then let's move to steps now.


Step 1:

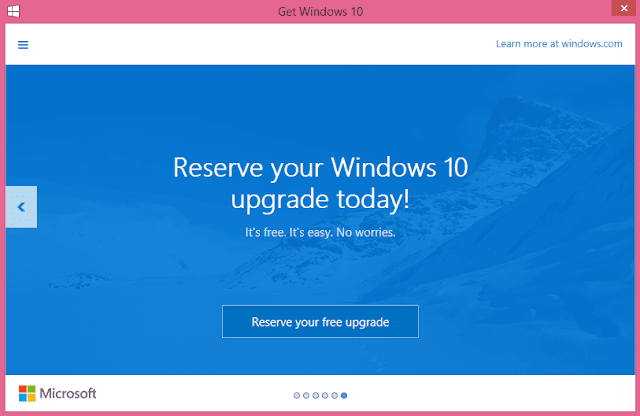
As said you need to be a  qualifed  windows user and has ability to update your windows. So check for an update in Windows update option found in the control pannel and update the same. Click on the image to see the Get Windows 10 app found on the right side of the task bar, after we updated our system running Windows 8.1 Pro.


Step 2:

Click on the Get Windows 10 app (see the image above). You should see the following screen.


Step 3:

 Click on "Reserve your free upgrade". After clicking you must see the following screen. Great, your upgrade is reserved! Though you can skip email confirmation but we would recommend you to enter your email to get a confirmation.


Step 4:

The following screen appears after entering your email address in step 3.


That's it for now. Sit back and relax. You will be notified when your updgrade is ready.


How to Verify you have reserved your free upgrade?

There are  two method for this:

1) Get Windows 10 App: If you click get windows 10 app again  after processing all the above steps you will see the following screen and you won't find any option for Reserving your free upgrades that means you have successfully reserved your windows 10 free upgrade.


2) Email Confirmation: If you have completed step 3 you should receive the email confirmation for the same. That means you have successfully Reserved your free upgrades. Here is the snapshot of email confirmation from Microsoft.


Hope this helps! Do let us know any questions commenting below and we shall be happy to answer. Please consider it by sharing.


5.29.2015

How to know your router IP address

Posted By: RB - May 29, 2015


Sometimes we want to configure our Internet router for various settings but we don't know it's IP address to login and have access to it. In this post we will tell you how you can know your router IP address.

The very first thing you need to do is to have your router switched on. Following that you need to open cmd prompt and type "ipconfig". Now you will get the following screen:


Now look for the Default Gateway in the above figure and type the same address in browser i.e. 192.168.0.1 when you type this in you will get your router login screen (depending on your router).


Hope this helps!

5.18.2015

Google Chrome Dinosaur offline game

Posted By: rbashish - May 18, 2015

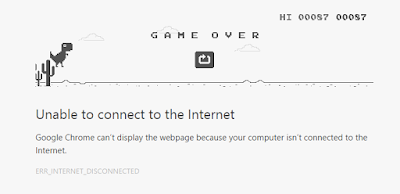
Have you been in a situation like this? Yes you have been, not just once but many times. Right? Do you know that there is a hidden game behind this page. While you wait for the network to come, you can play and make the Dinosaur to jump over cactus plant. Now the question is How...?

Here is How:
When you see the above page, you can play it by hitting/pressing space bar to start or jump. There is another key for doing the same and you can do it with up arrow button as you do with space bar. This was the method to start. But what when you game is over and you want to play once again and don't want to use mouse to reload the game...?


To reload the game without using mouse simply press space bar or up arrow to reload the game and play again. 

Happy Running...

1.22.2015

Whatsapp on Desktop PC (Official)

Posted By: rbashish - January 22, 2015

Whatsapp now on windows (official). Yes you heard it right! 


After the wechat which took the lead in announcing its web version for its instant messaging chat service; facebook following the same to rise a competition in international market and now it has officially announced the web version of its IM chat service. As of now (before the release of web client) users are accessing the whatsapp (or any other android application) through a desktop client called Bluestacks which is not as smooth as it should be. But after the official web version of whatsapp user will be able to chat from desktop with ease & comfort.


How to access whatsapp on web:


  • Now open your whatsapp application on your mobile and select "whatapp web" on the chats option menu

  • Now scan the QR code with your phone to log in


Note: 
  1. For now (till writing this article) whatsapp can only be accessed from Google Chrome only.
  2. To activate whatsapp web, your phone must be connected to Internet or WiFi because it only works in sync with your phone.
  3. You need to have a latest version of whatsapp to be able to use the features of whatsapp web.

Restriction
  • Unfortunately, whatapp web client will not be available to iOS users due to Apple platform limitation.

Hope you find it helpful, please consider sharing!


8.11.2013

Windows 8 WiFi Problem Solved!

Posted By: rbashish - August 11, 2013


So far we've heard a lot about Microsoft's new operating system Windows 8 such as New Look, Windows Store, fast start up and much more. But that's the same operating system which has caused a headache for many users. Some of the headache are  WiFi & Bluetooth which get inoperative.  OK Fine, let's know how to get rid of this headache.


The Very First thing when we upgrade to windows 8 through Windows Upgrade assistance it checks the different programs for program compatibility issue and uninstall the program if it is incompatible. 

If you have installed windows 8 drivers from your PC manufacturer website, I would recommend to uninstall the Power Management driver (only) for windows 8 and install the windows 7 Energy (Power) Management driver. Though there is a 100% chance of Program Compatibility issue which you can ignore.


By following above method you can get back your WiFi in an operative way with Fn + function button. Please share your comment with this blog. Also let me know if this has worked for you or not?


7.10.2013

Securely save all your web-login without any additional software

Posted By: rbashish - July 10, 2013
Mozilla Firefox, Google Chrome, Internet Explorer; these are the three most popular internet web browser for windows. Each browser has its special purpose. like...

  • Mozilla Firefox - best known for security
  • Google Chrome - known for fast browsing experience
  • Internet Explorer - good for browsing official sites 

If you look at usage share of web browser you will find Google chrome to be most popular among other web browsers. But if you are concern about the security you will find Firefox to be the best. Let me tell you Hackers and Network professionals uses Firefox. Even if you work with Linux BackTrack (which is an operating system used by Network professionals) you will find firefox as default browser. This post is based on using One Master Password for all web login in Mozilla Firefox.


So how can you Save all your login Username and password with just One password without any need of additional software. Here is the steps to follow:


Step 1:

Open Mozilla Firefox web browser. Click on the top-left corner of the browser (written as Firefox).


Step 2:

Go to Option and again option, a window will open as shown here. Check the "Use a master password" box. After checking in this box you will be prompted to create a Master password in step 3.

Step 3:

In this screen, create your master password and press OK.


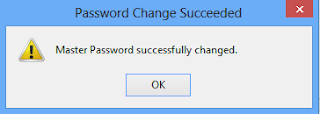
After this step following screen must pop up instructing for change of Master Password.


Note: To save your username and password you must click on "Remember password" after you login. This is mandatory. And the next time when you log you will be prompted to enter Master Password.

Do make sure that you don't lose access to your master password. If however you forget that then there is no way to recover your master password and the usernames/passwords associated with it will not be accessible. 


* Got into problem leave your comment here & I shall be replying to that...


7.05.2013

How to disconnect/eject the devices directly(safely) without using Safely Remove Hardware notification icon

Posted By: rbashish - July 05, 2013
Sometimes we are in such a hurry that we don't focus on the performance of our system. Like we eject the device directly without clicking on the Safely Remove Hardware notification icon (which may cause performance issue). This Post will let you know how we should eject the device safely without using Safely Remove Notification icon and also how we can have better performance.


For this purpose we have to open a Program "Device Manager" for performing the required task. There are different ways through which a device manager can be opened but the easiest way is being reported here. 


Step 1: 

Open Run Command(press window button+ R) and type devmgmt.msc. A Device Manager window will appear. Click on the Disk drives.


Step 2:

Now click on the the removable device for which you want to change the setting. In my case it is Kingston Data Traveler G3 USB Device.


Step 3:

After clicking on removable device the next window screen will appear like this. Click on Policies.


Now choose quick removal which is default Removable policy in windows 8. And press OK.


P.S: Though it is set as default policy in windows 8, it is recommended that you use Better performance option to use the Safely Remove Hardware notification icon for disconnecting devices. 


Profile Admin

Copyright © 2014 - 2016 | All rights reserved by BlogEdge

Creative Commons License
Google Analytics Alternative