Hello folks, in our previous post we looked at the the Windows 10 release dates, features and how to reserve your Windows 10 free upgrade (with short description). Click here to read previous post. But in this post we will be looking at complete step by step guide to reserve windows 10 free upgrade. Before you begin you might want to make a note:
In order to reserve your free upgrade to Windows 10 you need to be a qualified windows user to be able to participate in reserving the same. If not we are sorry you won't be able to reserve and upgrade to windows 10. This is what Microsoft has planned right now. We believe you got our note! Right? OK then let's move to steps now.
Step 1:
As said you need to be a qualifed windows user and has ability to update your windows. So check for an update in Windows update option found in the control pannel and update the same. Click on the image to see the Get Windows 10 app found on the right side of the task bar, after we updated our system running Windows 8.1 Pro.
Step 2:
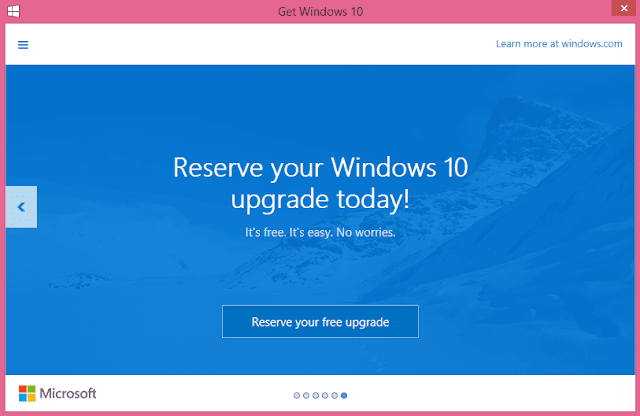
Click on the Get Windows 10 app (see the image above). You should see the following screen.
Step 3:
Click on "Reserve your free upgrade". After clicking you must see the following screen. Great, your upgrade is reserved! Though you can skip email confirmation but we would recommend you to enter your email to get a confirmation.
Step 4:
The following screen appears after entering your email address in step 3.
That's it for now. Sit back and relax. You will be notified when your updgrade is ready.
How to Verify you have reserved your free upgrade?
There are two method for this:
1) Get Windows 10 App: If you click get windows 10 app again after processing all the above steps you will see the following screen and you won't find any option for Reserving your free upgrades that means you have successfully reserved your windows 10 free upgrade.
2) Email Confirmation: If you have completed step 3 you should receive the email confirmation for the same. That means you have successfully Reserved your free upgrades. Here is the snapshot of email confirmation from Microsoft.


 Popular
 Tags
Tags
 Videos


0 comments :
Post a Comment